Nomad eSIM USA Your Complete Guide to Staying Connected
Grabbing a Nomad eSIM for the USA is the quickest way to get affordable data the moment you touch down, letting you sidestep those annoying airport SIM card kiosks and dodge your home carrier's outrageous roaming fees. An eSIM is a digital SIM card you download straight to your phone, getting you online instantly for maps, Ubers, and messages.
Your Instant USA Connectivity Guide
Welcome to the States! Forget that old familiar travel stress of hunting down a local SIM card or trying to connect to spotty airport Wi-Fi. An eSIM is a modern traveler's secret weapon. It acts like a digital passport for your phone, unlocking local data networks without needing a tiny piece of plastic.
Think of it as pre-ordering your internet access so it’s ready to go the second you land.
This approach completely changes the first few hours of your trip. Instead of fumbling around for a connection, you can step off the plane and immediately:
- Book an Uber or Lyft from the airport to your hotel.
- Fire up Google Maps without having to download offline maps ahead of time.
- Let friends and family know you’ve arrived safely.
- Pull up your hotel reservation or double-check your plans.
Why Nomad Is a Top Choice for Travelers
Nomad has quickly become a go-to for international travelers who need reliable, no-fuss connectivity. Its popularity is a direct result of its dead-simple app and competitive pricing, which takes all the guesswork out of getting online abroad.
An eSIM gets rid of the logistical headache of finding a SIM card store when you arrive. It’s also far more secure than sketchy public Wi-Fi and saves you a ton of money compared to your home provider's roaming packages.
The company's rapid growth proves just how much demand there is for easy, fast digital solutions. This shift is driven by travelers like us who value convenience and affordability above all else. You can see this reflected in Nomad's clean app interface, designed to get you connected in just a few taps.
As you can see, the design is clean and intuitive, making it incredibly easy to pick a destination and see the available data packages at a glance. For a full breakdown of all your options, you can check out our detailed comparison of the best eSIMs for the United States.
We’ve designed this guide to give you the essentials right up front. The goal is to help you pick the right Nomad eSIM USA plan quickly so you can get back to what matters—enjoying your trip.
How a Travel eSIM Unlocks USA Connectivity
An eSIM—or embedded SIM—is what makes getting online instantly in a new country possible. The easiest way to think about it isn't as a piece of hardware, but more like a digital keycard for your phone's network access. Instead of fiddling with a tiny plastic chip every time you land somewhere new, an eSIM lets you digitally download and switch to a new mobile network on the spot.
For anyone traveling to the USA, this simple idea is a complete game-changer. The US is a massive country with major carriers like AT&T and T-Mobile dominating different regions. With a physical SIM, your first stop would be a carrier store to pick a plan and get activated, all while you're disconnected and trying to find your way. A nomad eSIM for the USA lets you skip that entire headache.
You can buy and set up your plan from home on your Wi-Fi before you even pack your bags. The moment your plane touches down in the U.S., you just flick a switch in your settings, and you're connected to a local network. It’s that simple.
From Plastic to Pixels: The eSIM Advantage
Moving from physical SIMs to eSIMs solves some of the biggest frustrations of travel. It's not just about making things easier; it's also about staying secure and saving money. Hopping on public Wi-Fi at the airport or a cafe is convenient, but it can leave your personal data wide open to security risks. An eSIM gives you a private, secure data connection you can trust for everything from checking your bank balance to navigating a new city.
It's also a powerful alternative to the outrageously expensive international roaming packages your home provider loves to sell. Those plans are notorious for their tiny data caps and shocking overage fees. An eSIM, on the other hand, connects you directly to local data rates, which are almost always a fraction of the cost. If you want to get into the nitty-gritty, you can learn more about what an eSIM is and how it works.
Why the USA Is an Ideal eSIM Market
The United States is perfectly set up for eSIM technology, and its adoption has been incredibly fast. That's because the latest smartphones and all the major U.S. carriers have fully embraced this digital-first approach to getting online.
An eSIM essentially lets you "download" a local SIM card profile directly to your phone. This means no more searching for carrier stores in a new city or fumbling with tiny SIM ejector tools. It's instant, digital, and ready when you are.
This widespread support from carriers makes the whole experience seamless for international visitors. The U.S. has cemented its role as the world's dominant market for eSIMs, with phone makers and networks working together to streamline digital connectivity. In fact, analysts reported that 41% of devices launched in the past year included eSIM capabilities, making the U.S. the strongest market for the technology. You can dig into more eSIM adoption trends and device compatibility on TechCrunch.
This robust infrastructure means that when you arrive with a nomad eSIM for the USA, you’re not just trying out some new tech—you’re plugging into a mature, reliable system built for exactly this kind of seamless connection.
Choosing Your Perfect Nomad eSIM USA Plan
Alright, you've confirmed your phone is eSIM-ready. Now for the fun part: picking a data plan that actually fits your trip. It's easy to get drawn in by the biggest data packages, but a savvy traveler knows that value is the real name of the game. The best Nomad eSIM USA plan isn't the one with the most gigabytes—it's the one that gives you exactly what you need without you paying for data that will just go to waste.
To figure this out, you need to look past the flashy headlines and focus on two key metrics: cost per day and price per GB. These numbers cut straight to the point, telling you what you’re really getting for your money. A massive 50 GB plan might look like a great deal, but if it expires in 15 days and you're just in town for a long weekend, you've overpaid. On the flip side, a cheap 3 GB plan could get chewed up in a single afternoon of heavy Google Maps and Spotify use.
Estimate Your Data Needs
Before you can pick a winner, you need a ballpark idea of how much data you'll actually burn through. Just think about how you use your phone on a typical day. Are you a light user who just needs to check emails and navigate, or are you constantly streaming videos and uploading to Instagram?
Here’s a quick gut check to help you estimate:
- Light User (Under 1 GB/day): You're mainly using navigation apps like Google Maps, checking emails, messaging on WhatsApp, and doing some casual social media scrolling.
- Medium User (1-2 GB/day): You do all of the above, but you also stream music, watch a handful of YouTube videos, and hop on a few video calls.
- Heavy User (3+ GB/day): Your phone is your lifeline. You’re streaming HD video, using it as a hotspot for your laptop, and uploading high-res photos and videos all day.
Once you’ve identified your user type, just multiply that daily estimate by the number of days you’ll be in the States. That gives you a solid target for the total data you'll need.
This little flowchart can also help you decide if an eSIM is even the right tool for the job.
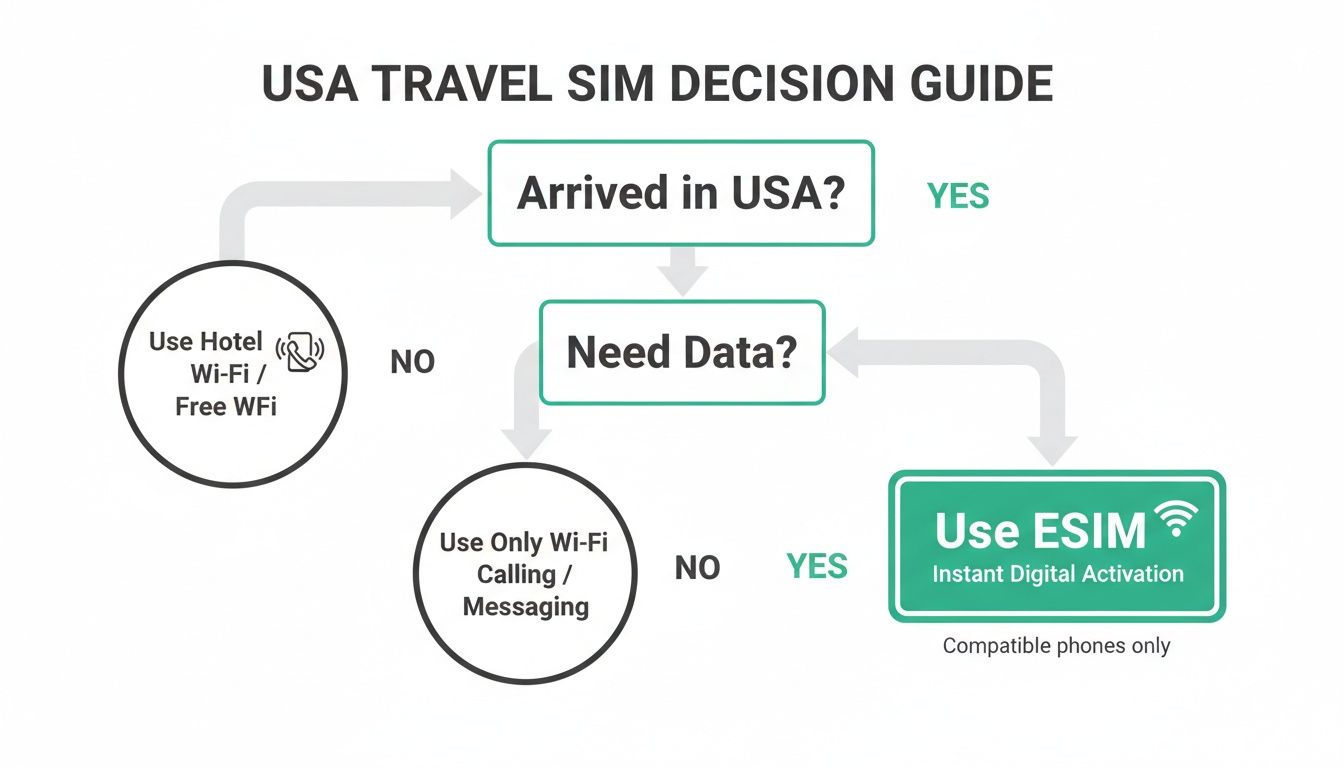
As you can see, if you need guaranteed data the second you land, an eSIM is the simplest and most reliable way to go.
Compare Plans Based on Value Metrics
Okay, let's put this into practice. By calculating the price per GB and cost per day, you can quickly spot the true bargains. For instance, a 10 GB plan valid for 30 days at $20 has a much better daily value ($0.67/day) than a 5 GB plan for 7 days at $10 ($1.43/day), even though the second plan seems cheaper at first glance.
A plan's true value is a balance between its total data, how long you have to use it, and the overall cost. Always calculate the price per GB and cost per day to make a truly informed decision.
To save you the trouble of pulling out a calculator, we’ve crunched the numbers on some of the most popular Nomad eSIM USA plans. This table gets right to the point, showing you the value metrics that matter so you can find the perfect fit for your trip.
Comparing Popular Nomad eSIM USA Plans by Value
Here's a data-driven breakdown of Nomad eSIM plans for the USA, focusing on key metrics like Price per GB and Cost per Day to help you make the smartest choice.
| Plan Name | Data (GB) | Validity (Days) | Total Price | Price per GB | Cost per Day |
|---|---|---|---|---|---|
| USA 3GB | 3 | 30 | $7.00 | $2.33 | $0.23 |
| USA 5GB | 5 | 30 | $11.00 | $2.20 | $0.37 |
| USA 10GB | 10 | 30 | $16.00 | $1.60 | $0.53 |
| USA 20GB | 20 | 30 | $25.00 | $1.25 | $0.83 |
| USA 50GB (Regional) | 50 | 60 | $45.00 | $0.90 | $0.75 |
The takeaway here is pretty clear: buying in bulk drives your cost per gigabyte way down. The 50 GB plan gets you data for less than a dollar per GB, making it a fantastic deal for longer trips or for anyone who knows they'll be a heavy data user.
Always Check Network Coverage
One last thing—a great plan is useless if you don't have a signal. In the USA, Nomad primarily piggybacks on the powerful networks of carriers like AT&T and T-Mobile. While their coverage in cities and along major highways is rock-solid, it can get a bit patchy once you venture into rural areas or national parks.
Before you hit "buy," take 30 seconds to check the coverage maps for these networks, especially if your trip includes off-the-beaten-path destinations. A quick search for "AT&T coverage map" will show you exactly what to expect. This final step ensures your nomad eSIM for the USA keeps you connected no matter where your American adventure takes you.
Activating Your Nomad eSIM Step By Step
Getting your Nomad eSIM for the USA up and running is surprisingly simple. If you can download an app, you can handle this. The whole thing happens right on your phone, usually in just a few minutes, from the moment you buy it to when you're live online.
The trick is doing things in the right order. Follow these steps, and you'll have a working connection the second you touch down, without accidentally starting your plan's clock before you even leave home. Let's walk through it.
The Golden Rule of eSIM Activation
Before we get into the nitty-gritty, there’s one tip that solves 99% of activation headaches. It's a simple two-part strategy that I tell everyone.
Install before you go, activate when you arrive. Get the eSIM profile set up on your phone while you’re still at home on your reliable Wi-Fi. But—and this is the important part—don't actually turn it on until you've physically landed in the United States.
This approach is foolproof. Installing at home means you aren’t fighting with spotty airport Wi-Fi. Waiting to activate ensures your plan’s validity—whether it's 7, 30, or 60 days—only kicks in the moment you actually need it. You get every single minute you paid for.
Step 1: Purchase and Prepare Your eSIM
First things first, you need to buy your plan. You can do this right in the Nomad app or on their website. As soon as you complete the purchase, an email will land in your inbox with a QR code and some simple instructions. Think of that QR code as the digital key to your USA data.
With that email in hand, you're ready to add the eSIM to your phone. Just make sure you're on a solid Wi-Fi connection before you move on.
Step 2: Install the eSIM Profile on Your Device
Now it's time to "install" the eSIM. This part doesn't start your data plan or cost you anything. It just adds the new cellular plan to your phone so it's ready to go when you are.
For iPhone Users:
- Head to Settings > Cellular.
- Tap on Add eSIM or Add Cellular Plan.
- Choose Use QR Code and point your camera at the code in your email.
- Just follow the on-screen prompts to finish adding the plan.
For Android Users (Samsung/Pixel):
- Go to Settings > Network & Internet.
- Tap the + symbol next to Mobile network.
- Look for an option like Download a SIM instead? and select it.
- Scan the QR code from your email to get the new network profile loaded.
Your phone will then ask you to name the new line. Do yourself a favor and label it something obvious like "Nomad USA." This makes it super easy to tell apart from your home SIM when you need to switch things around. And before you move on, it never hurts to double-check that your device is ready for this. You can learn more by reading our guide on how to determine if your phone supports eSIM.
Step 3: Activate Upon Arrival in the USA
This is the final move. Once the plane has landed and you're officially on U.S. soil, it’s time to bring your new connection to life.
Here’s how to flip the switch:
- Turn on Your eSIM: Jump back into your phone’s Cellular or Mobile Network settings and toggle your "Nomad USA" line to ON.
- Enable Data Roaming: Make sure Data Roaming is switched ON specifically for your Nomad eSIM. This is absolutely critical, as it allows the eSIM to connect to local partner networks like AT&T or T-Mobile.
- Select for Data: In your settings, designate your Nomad eSIM USA as the primary line for Cellular Data.
Give it a moment. Your phone will find a local network, and you'll see the signal bars pop up. Just like that, you're online. Your data plan is officially active, and you're ready to go.
Advanced Tips for Digital Nomads and Power Users
For digital nomads and remote workers, connectivity isn't just a nice-to-have—it's the bedrock of your entire lifestyle. Simply getting online isn’t enough. You need a rock-solid strategy to stay connected, productive, and in total control of your data, wherever you are in the States.
This is where you move beyond just using an eSIM and start mastering it. With a few smart techniques, you can turn your smartphone into a powerful mobile office, ready for anything from client video calls to hefty file transfers.
The Dual-SIM Workflow
One of the slickest features of any modern smartphone is the ability to run two cellular plans at once. For a digital nomad rocking a Nomad eSIM USA plan, this unlocks a game-changing workflow.
Think of it as having two dedicated lines in a single phone. You can keep your primary phone number active (on a physical SIM or your home eSIM) for calls and texts, while dedicating your fresh Nomad eSIM entirely to high-speed U.S. data.
This setup gives you some serious perks:
- Cost Control: You completely sidestep your home carrier’s insane international roaming fees for data.
- Seamless Communication: Friends, family, and clients can still reach you on your regular number without a hitch.
- Optimized Performance: You can reserve your Nomad eSIM's data purely for work, ensuring you always have the bandwidth when you need it most.
This dual-SIM approach is the core strategy for any serious traveler. It separates your personal line from your data workhorse, giving you the best of both worlds without compromise.
Managing Data for Long-Term Stays
If you’re hanging out in the USA for more than a few weeks, your data needs are going to change. A single plan probably won't cut it for the whole trip, so managing your data becomes key. Instead of rationing data like it's 2010, you just need to plan ahead.
Most eSIM provider apps, including Nomad’s, make it dead simple to top up your data or grab a new plan right from your phone. When you see your data getting low, just buy another package. It'll be ready to activate the second your current one runs out, so you never have to deal with a connection gap.
Plus, a longer stay lets you optimize for value. You can start with a smaller plan to test the network where you’re staying. Once you know it’s solid, you can confidently buy a larger, more cost-effective package, like a 50 GB or 100 GB plan.
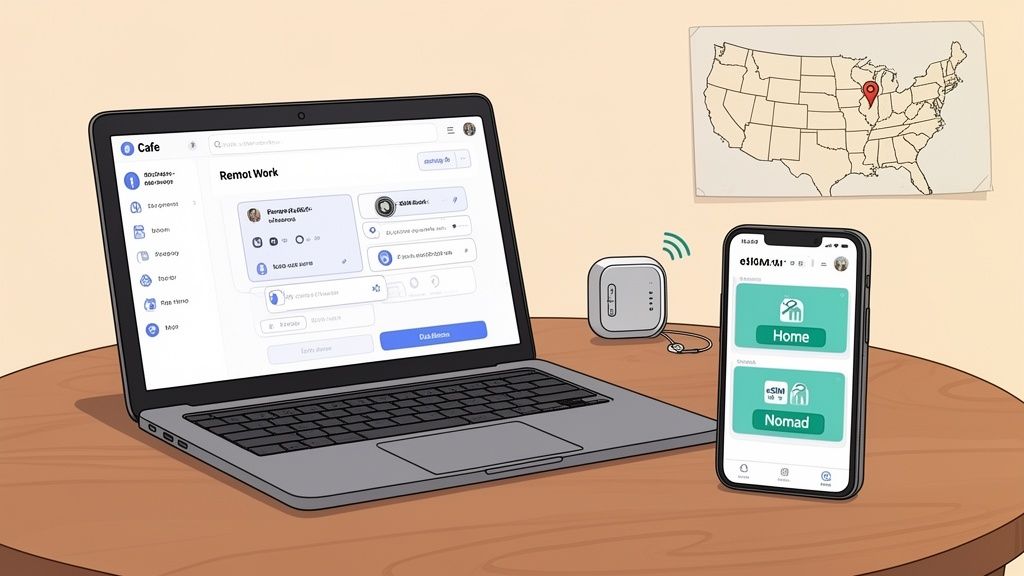
Turn Your Phone into a Reliable Hotspot
For remote work, your laptop is usually the star of the show. Your phone’s hotspot feature is what connects that laptop to your Nomad eSIM USA data plan, and getting it right is crucial for staying productive.
- Activate the Hotspot: Head into your phone’s settings and flip on the "Personal Hotspot" or "Mobile Hotspot" toggle.
- Set a Strong Password: Always lock down your hotspot with a secure password to keep data leeches out.
- Connect Your Devices: On your laptop or tablet, find your phone's Wi-Fi network and connect to it like any other router.
This setup is perfect for working from a café, a co-working space, or even a park bench. Just remember, tethering chews through data way faster than normal phone use. Keep an eye on your usage, especially if you're streaming or downloading big files.
The demand for this kind of flexible connectivity is exploding, with the travel eSIM market projected to grow from $585.33 million to over $709.68 million in the next year. Dozens of brands are now competing on price and user experience. You can dig into the numbers in this travel eSIM market intelligence report on 360iResearch.com.
What to Do When Your eSIM Isn't Connecting
Even the best tech has its moments, especially when you’re trying to get online in a new country. If your Nomad eSIM USA doesn't connect right after you land, don't worry. This is actually a super common hiccup, and the fix is usually just a couple of taps away—no need to even contact support.
Seeing "No Service" after landing is the classic scenario. It almost never means your eSIM is faulty. Instead, it’s usually just a simple permission setting your phone needs before it’s allowed to link up with a foreign network.
The first thing to check, and the most common culprit, is Data Roaming. You have to make sure it’s switched on for your Nomad eSIM line specifically. Your phone often keeps this off by default on all your lines to prevent surprise charges, but a travel eSIM absolutely needs it to work.
Your First-Aid Checklist for a Quick Fix
Before you start digging into deeper settings, run through these two steps. Honestly, over 90% of connection problems disappear after one of these, getting you online in less than a minute.
- Toggle Airplane Mode: It's the oldest trick in the IT playbook for a reason. Flip Airplane Mode on, wait about 30 seconds, and then turn it off. This forces your phone to do a fresh scan for local networks and often kickstarts the connection.
- Restart Your Device: If that doesn't work, a full reboot is the next step. Power your phone all the way down, give it a moment, then turn it back on. This can clear out any weird temporary glitches in the background.
Still no luck? Okay, now it's time to take a slightly more hands-on approach with your network settings.
Manually Selecting a Network
Sometimes, your phone gets a little indecisive and struggles to automatically pick the best local network. When that happens, you can step in and tell it exactly which one to use. For Nomad in the USA, this usually means choosing AT&T or T-Mobile.
Forcing a manual network selection is like giving your phone a direct order instead of a suggestion. It cuts through any confusion and tells it precisely which cell tower to talk to, bypassing any auto-selection bugs.
Here’s how you do it:
- Go into your phone’s Cellular or Mobile Network settings.
- Tap on your Nomad eSIM to see its specific options.
- Find Network Selection and toggle off the "Automatic" switch.
- Your phone will search and show a list of all available networks. Pick either AT&T or T-Mobile from that list and give it a moment to connect.
If the first one you select doesn't work, just go back and try the other. This little nudge is often all it takes to establish a solid connection.
As a final step, if you’re still offline, you might need to check your APN (Access Point Name) settings. Just pull up the original installation guide from Nomad to double-check that everything matches. And if all else fails, their support team is always ready to jump in and help with the trickier stuff.
Your Top Questions About Nomad eSIM in the USA
Even with the best guides, there are always a few lingering questions. Let's tackle the most common ones we hear from travelers using a Nomad eSIM for a USA trip. I've rounded them up here to clear up any last-minute confusion so you can buy with total confidence.
Can I Make Phone Calls with a Nomad eSIM Plan?
Most Nomad eSIM plans for the USA are data-only. That means you won't get a local phone number for making old-school cellular calls or sending SMS texts.
Honestly, this is rarely a problem anymore. You can just use your eSIM's data to call and message through apps you already have, like WhatsApp, FaceTime Audio, Skype, or Telegram. For most people, it's a far more flexible and way cheaper way to stay in touch with folks back home.
How Do I Know If My Phone Supports eSIM?
This is the one thing you absolutely have to check before buying any eSIM. The good news is that nearly all flagship phones from Apple, Google, and Samsung released since 2018 are good to go.
The quickest way to be sure is to dive into your phone's settings. On an iPhone, go to Settings > Cellular. If you see an "Add eSIM" option, you're all set. On an Android, it's usually under Settings > Network & Internet—tap the plus icon, and if you see a "Download a SIM instead?" prompt, your phone is compatible.
If you don't see those options, you'll probably need to stick with a physical SIM card for your trip.
When Does My Nomad eSIM Plan Actually Start?
Here’s a common mix-up: your plan's validity period—whether it's 7, 30, or 60 days—doesn't start the moment you install the eSIM. It only kicks in when your phone connects to a network in the United States for the very first time.
This brings us to the golden rule for a stress-free setup: install at home, but activate upon arrival.
Just follow these steps for a perfect landing:
- Install the eSIM using your Wi-Fi at home before you even head to the airport.
- When you land in the USA, open up your phone’s cellular settings.
- Switch on the Nomad eSIM line (you can even label it "USA Trip").
- Make sure data roaming is toggled on specifically for that eSIM line.
Your phone will then latch onto a local carrier like AT&T or T-Mobile, and that's when the clock on your plan starts ticking. It’s a simple trick that guarantees you get every single minute you paid for.
Ready to get connected for your USA adventure? eSimGuide.com compares plans from over 22 providers to find you the best deal in seconds. Visit https://esimguide.com to find your perfect eSIM plan today.