Your Ultimate Guide to Using an eSIM QR Code for Travel
An eSIM QR code is your express pass to getting connected abroad. Forget fumbling with tiny plastic SIM cards—this is the modern way to get a cellular plan. You get a unique code, usually in an email right after you buy a plan, and scanning it is all it takes to get online.
It's the digital equivalent of popping a new SIM into your phone, but it happens instantly.
What's Really Happening When You Scan That Code?
That little black-and-white square isn't just a fancy picture. Think of it as a highly compressed, secure set of instructions for your phone. When your camera scans it, your device is reading a command line that tells it exactly how to find and connect to a new mobile network.
All the data needed to download a new cellular plan is packed into that one graphic, which installs the plan directly onto your phone’s built-in chip.
The whole process works like giving your phone a pre-approved digital passport. Instead of the old routine—finding a local store, buying a SIM, and manually typing in settings—the QR code provides immediate clearance. Your phone shows this "passport" to the carrier's network, which verifies the credentials and connects you right away.
What's Packed Inside the Code?
The QR code is essentially a specialized link. It's a text string that points your device to a secure server, but it contains more than just a simple web address. It’s a very specific server location paired with a one-time-use activation code. If you want to dive deeper into the tech, our full guide on what an eSIM is and how it works breaks it all down.
Specifically, that QR code holds:
- SM-DP+ Address: This is the server address for the Subscription Manager Data Preparation. In simple terms, it's the secure digital warehouse where your new eSIM profile is stored, waiting for your phone to pick it up.
- Activation Code: A unique, single-use key that proves it's really you. It matches up with the server address to authorize the download of your specific eSIM profile.
- Confirmation Code (Optional): Some providers add this for an extra security check, kind of like a second password, during the setup.
The real job of an eSIM QR code is to securely connect your physical phone to a digital cell plan without you having to manually type in long, complicated server names or activation keys. It closes the gap between buying a plan and actually using it.
So, what does this technical jargon actually mean for you when you're standing in an airport trying to get online?
Decoding Your eSIM QR Code
This table translates the technical data inside an eSIM QR code into practical benefits for your trip.
| Encoded Data | What It Means for You | Why It Matters for Travel |
|---|---|---|
| SM-DP+ Address | Tells your phone exactly where to go to download its new cellular plan. | No more searching for local carrier stores or Wi-Fi hotspots to get set up. Your phone knows the address instantly. |
| Activation Code | Acts as the one-time password to prove you bought the plan. | This makes the process secure and ensures only your phone gets the plan you paid for, preventing unauthorized use. |
| Confirmation Code | An optional second key for extra verification. | Provides an added layer of security, giving you peace of mind that your connection is locked down. |
At the end of the day, all these pieces work together to make activation a simple, scan-and-go experience.
Why QR Codes Became the Standard
This simple but brilliant method has completely changed how travelers get connected. The QR code has been the star of eSIM activation since day one, turning a potentially confusing technical process into something anyone can do with their phone's camera.
While global adoption was just 3% last year, industry analysts see it crossing 5% in 2025. By 2026, it's expected to be the mainstream way to connect as more eSIM-only phones hit the market worldwide. This isn't a niche trend anymore; it's the future of mobile data.
How to Activate Your eSIM With a QR Code Step by Step
Getting your new eSIM up and running is surprisingly quick—often taking just a couple of minutes from start to finish. Once you have that eSIM QR code from your provider, all you really need is your phone and a decent Wi-Fi connection.
You might wonder why Wi-Fi is necessary. Think of the QR code as a special download link for your new cellular plan. Scanning it tells your phone where to go to fetch the plan details, and it needs an internet connection to do that. Without Wi-Fi, it can't download the profile.
The good news is that the process is almost identical for both iPhones and Androids, usually just a few taps deep in your phone's cellular settings. Let's walk through exactly how it's done on each platform.
This whole workflow is as simple as it looks. You get the code, you scan it, and your phone takes care of the rest.
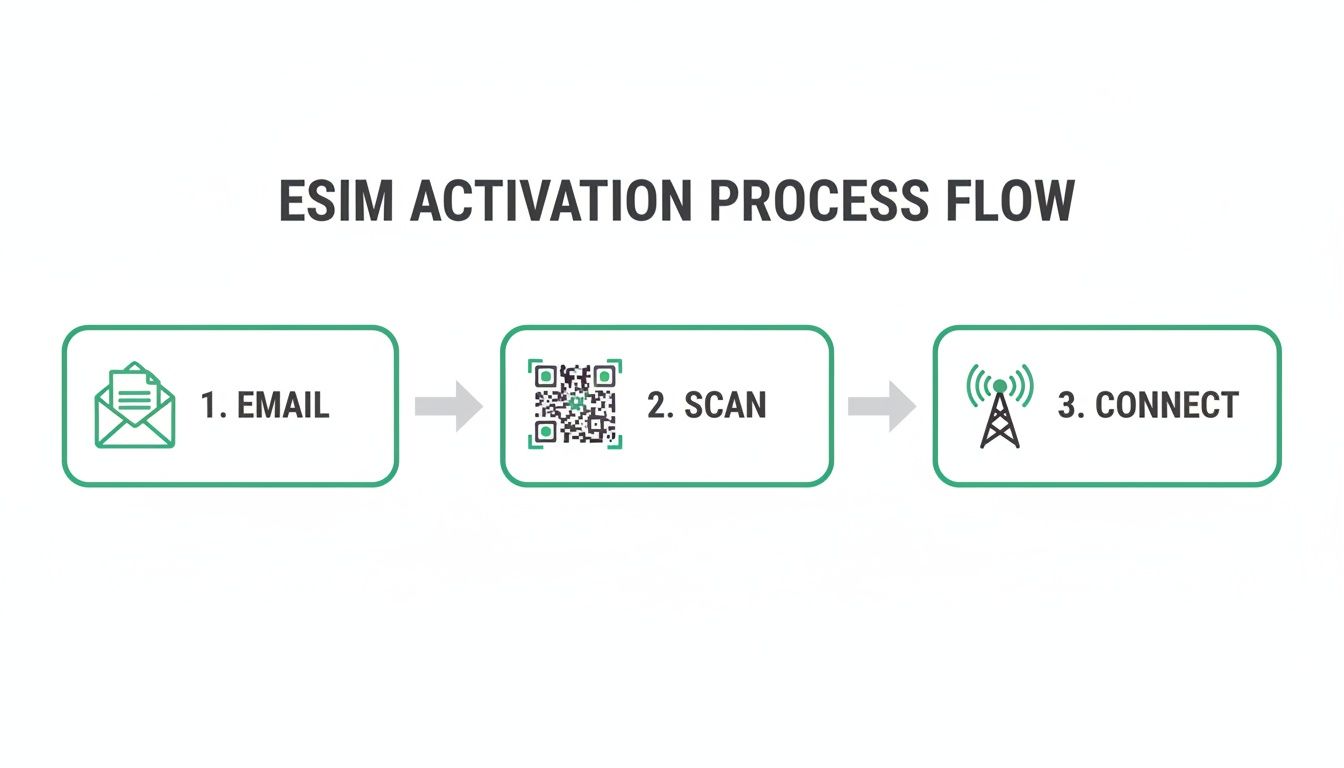
As you can see, it's a clean three-step sequence: get the code in your email, point your phone's camera at it, and let your device handle the final connection.
Activating on an iPhone (iOS)
Apple has made adding an eSIM an incredibly smooth process. Before you begin, just make sure you’re connected to a stable Wi-Fi network. You’ll also need the QR code displayed on another device—like a laptop or tablet—or simply printed on paper.
Follow these steps:
- Open the Settings app on your iPhone.
- Tap on Cellular (or Mobile Data in some regions).
- Choose Add eSIM or Add Cellular Plan.
- When prompted, select Use QR Code.
- Point your camera at the eSIM QR code and let it focus. Your phone will recognize it automatically.
- A screen will pop up saying, "A cellular plan is ready to be added." Just tap Continue.
- Follow the last couple of prompts to give your new plan a label (like "Travel eSIM" or "Work Line") and decide if it should be your primary or secondary line for data and calls.
And that’s really it! The eSIM is now installed on your phone. You can easily turn it on or off right from the Cellular settings. If you're not sure your phone is compatible, you can learn more about which phones support eSIM technology in our full guide.
Activating on an Android Device (Samsung & Google Pixel)
The process is just as straightforward on Android phones, though some menu names might differ slightly depending on who made your device. For a Samsung Galaxy or Google Pixel, the core steps are pretty much the same.
Just like with an iPhone, get on a solid Wi-Fi network first.
Here’s the typical workflow for Android:
- Head into the Settings app.
- Go to Network & Internet (or a similar menu like Connections on Samsung).
- Tap on SIMs or SIM card manager.
- Look for an option that says Add eSIM or Add mobile plan.
- Your phone will ask to use the camera. Tap Scan QR code from network.
- Line up the eSIM QR code in the camera frame.
- Once scanned, your phone will show the network details. Hit Add or Activate to download and install the plan.
- From there, you can manage the new eSIM, giving it a custom name and choosing how it's used for calls, texts, and mobile data.
Pro Tip: Don't activate your travel eSIM plan until you're about to leave or have just landed at your destination. Most plans have a validity period that starts upon activation, so activating too early could waste precious days of service.
Essential Tips for a Smooth Activation
A little prep can make sure your activation is completely seamless. These are the little things that help you avoid common hiccups and get connected right away.
- Use a Second Screen or a Printout: You can't scan a QR code that’s displayed on the same phone you're trying to activate. Pull it up on a laptop, tablet, or another phone. A simple printout works just as well.
- Check Your Internet Connection: A spotty Wi-Fi signal is the number one reason an eSIM download fails. If you get an error, find a stronger network and give it another shot.
- Label Your eSIMs Clearly: If you’re juggling multiple plans (like your primary line and a travel eSIM), give them distinct labels like "Home SIM" and "Europe Data." It makes it way easier to manage your settings and know which line is being used for data.
- Screenshot Your QR Code: As a simple backup, save a screenshot of your eSIM QR code to your phone’s photo gallery. If you ever accidentally delete the email, you’ll still have the code ready to go.
Ever wonder what actually happens between the moment you click “buy” on an eSIM plan and that QR code landing in your inbox? It feels instant, but a slick, highly secure process kicks off behind the scenes to make it happen. This digital supply chain is the magic that delivers global connectivity on demand.
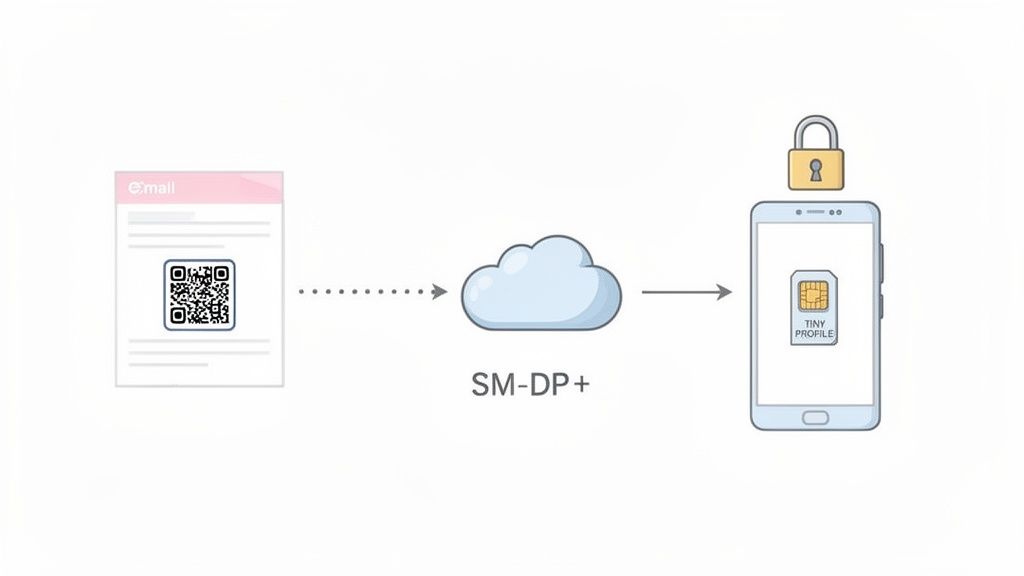
The whole thing starts the second your payment goes through. Our system immediately pings a secure, global server called the SM-DP+ (Subscription Manager Data Preparation). You can think of this as the digital equivalent of a high-security vault where eSIM profiles are created and kept safe.
The SM-DP+ acts like a specialized factory. It gets an order (your purchase), manufactures a unique product (your eSIM profile), and then packages it for delivery by encoding it into a QR code. The best part? This entire operation is automated, encrypted, and over in just a few seconds.
From Server to Your Screen
Once the SM-DP+ server has your unique eSIM profile ready, it generates a one-time-use activation address and a special key. All that technical info is then translated into the familiar black-and-white square you know as a QR code.
That eSIM QR code is then sent straight to you, usually by email. It’s crucial to understand that the code itself isn't the eSIM. It's just the secure key that tells your phone where to go to download the actual eSIM profile from the SM-DP+ server.
This whole digital delivery system is built for two things: speed and security. It guarantees that only your device can access and install the plan you just bought.
The journey from purchase to QR code is a secure, automated handshake between the provider, a global activation server, and your email inbox. This process ensures your eSIM is unique, protected, and ready for a one-time installation on your device.
Understanding this flow helps build confidence in the tech. An emailed QR code isn’t just a convenient picture; it’s the end result of a secure manufacturing process, making it just as reliable as getting a physical SIM card from a trusted store.
The Role of Global Standards
This entire system isn’t some wild west of technology. It’s all governed by strict standards set by the GSMA (Groupe Spéciale Mobile Association)—the same organization that oversees mobile technology across the globe. These standards are what ensure an eSIM from any provider can be securely installed on any compatible phone, anywhere in the world.
This standardized framework guarantees a few key things:
- Interoperability: Your eSIM-compatible phone can talk to any provider's SM-DP+ server, whether you have an iPhone or an Android.
- Security: Every single step, from creating the profile to downloading it, is locked down with strong encryption. This prevents anyone from snooping on or duplicating your eSIM.
- Reliability: The system is built to handle millions of activations simultaneously, making it a rock-solid way to get cellular plans onto devices.
So, the eSIM QR code system is far more than a simple convenience. It’s a testament to a secure, standardized global infrastructure that just works. This seamless digital journey turns a quick online purchase into instant connectivity, letting travelers get online the moment they land without messing with tiny plastic cards. It’s the true backbone of modern, hassle-free travel.
Keeping Your Connection Secure with an eSIM QR Code
As travel gets more digital, you’ve got to wonder if your connection is actually safe. You get an eSIM QR code in an email and the first thought might be, "Is this really as secure as a physical SIM card I get in a sealed package?"
The answer is a resounding yes, and it’s all down to some clever design.
Think of your eSIM QR code not as a permanent key, but as a single-use token. Once you scan it and the eSIM profile installs on your phone, that specific code is instantly used up. It's a goner. Nobody can scan it again to hijack your plan or sneak it onto another device.
This one-and-done approach is its biggest security feature. On top of that, the whole activation process is wrapped in heavy-duty encryption, creating a secure tunnel between your phone and the provider's server to download your profile safely.
Best Practices for Protecting Your eSIM
While the tech itself is solid, the weakest link in any security setup is usually us. It's just human nature. You wouldn't post your banking password online, and the same common sense applies to the email holding your eSIM QR code.
Here are a few practical habits to get into:
- Delete After Use: As soon as your eSIM is installed and working, just delete the email with the QR code. There’s no reason to keep it hanging around, and getting rid of it closes the door on any risk if your email account gets compromised down the line.
- Avoid Public Wi-Fi for Activation: You need an internet connection to get your eSIM running, but try to use a network you trust, like your home Wi-Fi or your hotel's connection. Public networks in cafes or airports can sometimes be a bit sketchy.
- Verify Your Source: Only buy eSIMs from providers you know and trust. Be wary of suspicious links or QR codes sent from random sources—they could be outright scams.
Beyond the tech, one of the biggest threats to any digital connection comes from simple human trickery. It pays to understand the different kinds of social engineering attacks and how to spot them, as this is crucial for keeping all your digital accounts safe, not just your eSIM.
Why You Can Trust the Process
The shift to digital connectivity, especially for travel, has pushed these security measures to the forefront. Travel has become a huge driver for eSIMs, with a quarter of UK consumers already using them to get local rates abroad. Globally, smartphone eSIM penetration hit 23% in 2024, with the U.S. leading the charge at 41%.
The industry is constantly tightening things up, too. The GSMA's SGP.32 standard is the latest step, making QR-based setups even more secure and seamless. If you want to dive deeper into this trend, you can read the full report on eSIM adoption on TechCrunch.com.
Ultimately, an eSIM QR code is designed for a single, secure transaction: to deliver a unique cellular profile to a single device. By following basic digital hygiene, you can be confident that your travel connection is both convenient and safe.
This system gives you the power to get online fast without sacrificing your peace of mind. Treat your QR code like any other piece of sensitive digital info, and you can enjoy all the perks of eSIM tech without a worry.
Troubleshooting Common eSIM Activation Issues
Even a process as slick as scanning an eSIM QR code can hit a snag now and then. The good news? Most of these hiccups are tiny issues you can fix in seconds, no customer support call required. Think of it as a quick pre-flight check before your digital connection takes off.
When things don't work right away, don't jump to the conclusion that your eSIM is faulty. More often than not, the problem is something simple in your environment or a setting on your phone. From a smudged camera lens to a shaky Wi-Fi signal, let's walk through the usual suspects.
This guide is your go-to manual for diagnosing and solving these little annoyances so you can get online smoothly.
The QR Code Won't Scan
This is easily the most common frustration: your phone’s camera just stares blankly at the QR code, refusing to recognize it. It feels like a major failure, but the fix is usually surprisingly simple. Your phone just needs a clear, well-lit view to read the code.
Before you do anything else, try these quick fixes:
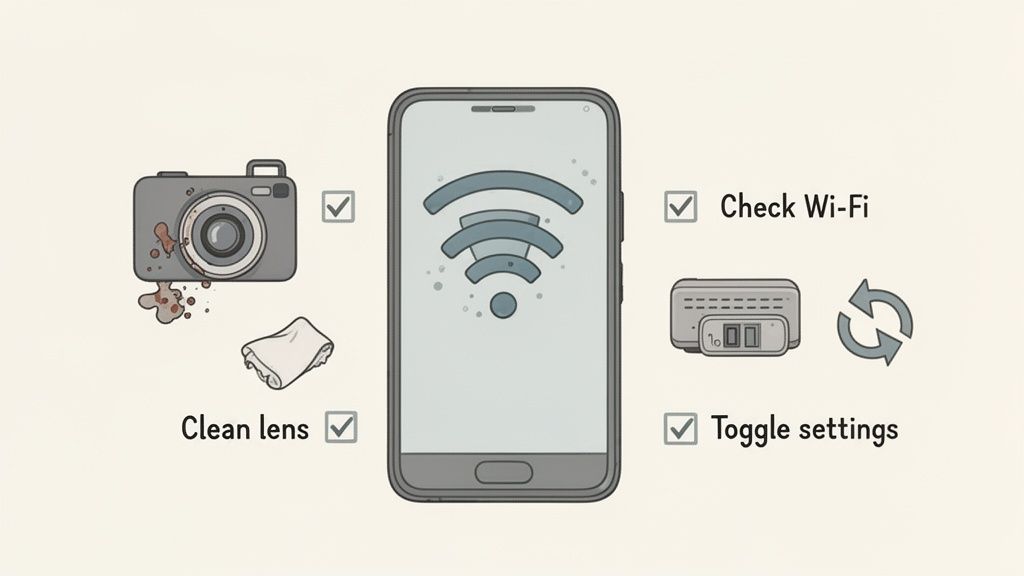
- Clean Your Camera Lens: A fingerprint or smudge on your phone's camera is the #1 reason for scanning fails. Give it a quick wipe with a soft cloth and try again.
- Adjust Distance and Lighting: Get closer, move further away, and make sure you’re in a well-lit room. Glare on the screen displaying the code is a common enemy.
- Zoom In on the Code: If you're scanning from a laptop or tablet, blow up the QR code to make it larger and sharper. A tiny code is tough for any camera to focus on.
If you’ve tried all that and it still won’t scan, there's a small chance the QR code image itself is low-quality or corrupted. In that rare case, reaching out to your provider for a new one is the next logical step.
A failed scan almost never means your eSIM is broken. It’s a physical problem with how the camera is seeing the code. Treat it like taking a photo—if the subject is blurry or the lighting is bad, the picture won't turn out right.
Activation Fails After a Successful Scan
Okay, so the scan worked perfectly, but now you’re staring at an error like "Unable to Activate eSIM" or "Cellular Plan Cannot Be Added." This tells you the problem isn’t the code itself but the next step: downloading the eSIM profile from the server.
This kind of error almost always points to a single culprit: your internet connection.
- Check Your Wi-Fi Signal: Your phone must have a stable internet connection to download the eSIM profile. A weak, spotty, or captive Wi-Fi (like at a hotel or airport) will cause the download to fail.
- Restart Your Phone: The classic tech support advice works for a reason. A simple reboot can clear temporary network glitches that are getting in the way.
- Temporarily Disable Your VPN: If you’re running a VPN, it can sometimes interfere with the connection to the activation server. Switch it off, install the eSIM, and then you can turn it right back on.
If you’re still running into device-specific issues, our guide on eSIM phone support and compatibility is a great resource for digging into the nuances of different models.
No Network Connection After Installation
You did it. The eSIM is installed, the phone says it's active, but the signal bars show "No Service." This is a super common scenario, especially for travelers who install an eSIM before they’ve even left home. The eSIM won't connect until it's physically within its intended coverage area.
But if you’re already at your destination and still have no signal, it's time to check a few key settings:
- Enable the eSIM: Dive into your phone’s cellular or mobile settings and make sure the new eSIM line is actually turned on.
- Turn on Data Roaming: This is the big one. Most travel eSIMs require data roaming to be enabled to connect to local partner networks. It's a crucial step that many people miss.
- Select the Network Manually: If your phone isn't connecting automatically, head to the network selection settings. You should see a list of local carriers—try choosing one manually to kickstart the connection.
Quick Fixes for Common QR Code Issues
Feeling stuck? This table is your cheat sheet. Use it to quickly diagnose what's going wrong and find the right solution on the spot.
| Problem | Likely Cause | How to Fix It |
|---|---|---|
| QR code isn't scanning | Dirty lens, bad lighting, or distance issues. | Wipe the camera lens. Move closer/further. Increase screen brightness or zoom in on the code. |
| "Activation Failed" message | Unstable Wi-Fi connection or VPN interference. | Connect to a strong, stable Wi-Fi network. Disable your VPN temporarily during setup. |
| "No Service" after installation | eSIM is off, Data Roaming is disabled, or you're outside the coverage area. | Go to settings and turn the eSIM line on. Enable Data Roaming for that line. Ensure you are in the destination country. |
| Code says "already used" | The QR code was successfully scanned once before. | These codes are single-use. Check your phone's cellular settings; the eSIM plan is likely already installed but may be turned off. |
With these tips in your back pocket, you should be able to navigate almost any installation hiccup. Most of the time, a little tweak is all it takes to get connected and on your way.
Exploring Alternatives to QR Code Activation
Scanning an esim qr code is definitely the most common way to get connected, but it’s not the only game in town. What happens if your phone's camera is on the fritz, or you’re a solo traveler without a second screen to display the code? Knowing the alternatives gives you a solid backup plan for any scenario.
These other methods ensure that no matter the situation, you can always get your travel eSIM installed and running. They give you flexibility and prove you always have a way to connect.
Manual Activation Details
Think of manual activation as the QR code's text-based twin. Instead of your camera doing the work, you simply copy and paste two key pieces of information directly into your phone's settings. Your provider will always supply these details alongside the QR code in your confirmation email.
The two critical components are:
- The SM-DP+ Address: This is basically the secure server address where your eSIM profile is safely stored.
- The Activation Code: This is the unique, one-time password that gives your phone permission to download the profile.
This method is a lifesaver when scanning just isn't an option. It achieves the exact same result, just without using the camera. Simply find the "Enter Details Manually" option in your phone's eSIM setup menu and paste in the info.
In-App Activation Process
For an even smoother experience, many eSIM providers now offer in-app activation. This is by far the most user-friendly alternative, as it handles the entire installation for you with just a few taps.
Instead of hunting through an email, you just download the provider's official app. After you buy a plan, you'll see a button like "Install eSIM." The app then communicates directly with the activation servers, installing the profile onto your phone without you ever seeing a QR code or an activation key.
This method is incredibly convenient because it automates the entire setup. The app securely manages the digital handshake between your device and the provider, making it the preferred choice for those who want a completely guided experience.
The growing popularity of these streamlined methods reflects a broader industry trend. In 2026, eSIM adoption is projected to skyrocket by 30%, hitting a staggering 1.5 billion devices worldwide. For travelers who rely on platforms like eSimGuide.com, this means more reliable options across 233+ destinations without ever needing a physical SIM again. You can learn more about eSIM adoption trends and what they mean for global connectivity on TechRadar.com.
Got Questions About eSIM QR Codes?
Even after you get the hang of how eSIMs work, a few common questions always seem to pop up, especially for first-time users. Getting these sorted out ahead of time means less stress and more confidence when you’re trying to get connected abroad.
We've pulled together the most frequent questions we hear to clear up any confusion and make sure your travel connectivity is a breeze.
Can I Reuse an eSIM QR Code on Another Phone?
Nope. Think of an eSIM QR code like a single-use concert ticket. Once it's scanned and the eSIM is installed, that code's job is done.
The QR code is essentially a key that unlocks a specific eSIM profile for a single download. Once you use it, the code is permanently tied to that installation and deactivated. You can't use it again on a different phone or even reinstall it on the same phone if you delete the profile. You'll always need a fresh QR code for a new activation.
What Should I Do If I Accidentally Delete My eSIM?
This is a common slip-up. If you go into your phone’s settings and remove your eSIM profile, you can’t just scan the old QR code to get it back. Remember, that code was a one-and-done deal.
The only thing to do is contact your eSIM provider's customer support right away. They're the only ones who can help. Depending on their policy, they might be able to issue a replacement QR code, but it's not always guaranteed. It’s always best to be super careful when managing your cellular plans in your settings.
Key Takeaway: Treat your active eSIM profile with care. Deleting it is a permanent move that requires a brand-new plan or a replacement from your provider, which might not always be possible.
Do I Need Internet to Scan the eSIM QR Code?
Yes, a stable internet connection is an absolute must-have for activation. The QR code itself isn’t the data plan; it’s just the secure address and credentials your phone needs to download the plan from the provider's servers.
When you scan the code, your phone has to connect to the internet (usually via Wi-Fi) to fetch and install the eSIM profile. This is exactly why we always recommend setting it up at home before you leave, or at your hotel when you arrive—anywhere with reliable Wi-Fi. You simply can't activate it without an existing internet connection.
Can I Print the QR Code Instead of Using a Second Screen?
Absolutely! Printing out your QR code is a fantastic backup plan, and we highly recommend it. It's especially useful for solo travelers who might not have a laptop or tablet handy.
As long as the printout is clear and not smudged, your phone's camera will read it just as easily as it would from a digital screen. This simple trick can be a real lifesaver when you need to get your eSIM activated but don't have another display nearby. It ensures you always have a reliable way to get connected.
Ready to find the perfect eSIM for your next adventure without the hassle? At eSimGuide.com, we compare plans from over 22 providers across 233+ destinations, so you can choose the best deal in minutes. Find your ideal travel eSIM on eSimGuide.com and connect the moment you land.


