How to Avoid Roaming Charges on Your Next International Trip
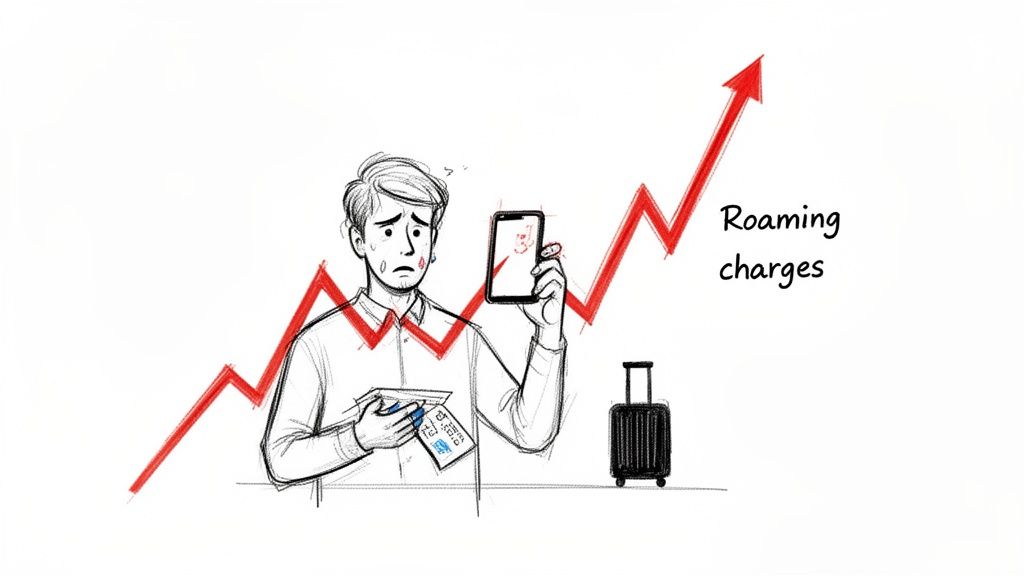
Let’s be honest, that gut-wrenching feeling of opening a post-trip phone bill to find a three or four-figure surprise is something no traveler should ever experience. This isn't just a story; it's a painful reality called "bill shock," and it comes from letting your phone's data roam unchecked in a foreign country.
The minute you land and turn off airplane mode, you're at the mercy of your carrier's default international rates. And trust me, they can be astronomical.
So, Why Are Roaming Fees So Insanely High?
When your phone leaves its home network, it "roams" by latching onto a partner network in whatever country you've landed in. Your carrier has to pay that foreign network for the service, and they pass those costs—plus a hefty markup—straight on to you.
The billing structures are often confusing by design, making it easy for charges to pile up fast.
- Pay-Per-Megabyte: This is the real wallet-killer. Every single megabyte of data you use—for a quick map check, a social media scroll, or an email sync—costs a set amount. This is how people end up with bills in the thousands.
- Daily Passes: Most major carriers offer a flat daily fee, usually around $10-$15 per day, for a set amount of data. It sounds convenient, but that adds up to $70-$105 for a one-week trip. Plus, they often throttle your speeds to a crawl after you hit a tiny daily cap.
- Monthly International Plans: These are pricier upfront options that give you a bucket of data, calls, and texts for a month. They offer more predictability but are almost always far more expensive than just getting a local SIM or eSIM.
Before you dismiss the risk, it’s worth seeing the numbers side-by-side. The difference between what your carrier charges and what you could be paying is pretty stark.
Roaming Costs at a Glance: Your Carrier vs. Alternatives
Here’s a quick breakdown of what you can expect to pay depending on how you choose to connect.
| Connection Method | Typical Cost Per Day | Data Included | Best For |
|---|---|---|---|
| Standard Carrier Roaming | $10 - $15 | Usually <1GB, then slow speeds | Short business trips where convenience is everything |
| International Day Pass | $10 | 500MB - 1GB high-speed | Very short trips (1-2 days) |
| Local SIM Card | $1 - $3 | Varies (e.g., 30GB for $20) | Longer stays (1+ week) and heavy data users |
| Travel eSIM | $1 - $3 | Varies (e.g., 10GB for $15) | Almost all travelers; maximum convenience |
As you can see, the alternatives aren't just a little cheaper—they're an entirely different ballgame. You can get weeks of data for the price of two days of a carrier pass.
The Staggering Reality of Roaming Bills
Those horror stories you hear about travelers coming home to bills as high as $30,000? They're real. It usually happens when someone travels to a country without a favorable roaming agreement, where the per-megabyte charges spiral without any warning or cap.
The global roaming market was valued at an eye-watering $72.6 billion in 2022 and it’s only growing. You can read more about the scale of global roaming costs and see for yourself. This massive industry is built on travelers who aren't prepared.
The financial risk of unchecked roaming is massive. A few minutes of browsing or a single video call can trigger charges that spiral out of control, turning a dream vacation into a financial nightmare.
Luckily, understanding the stakes is the first step. The good news is that you can completely sidestep these expensive carrier plans. This guide will show you exactly how.
Pre-Flight Checklist: Mastering Your Phone's Data Settings
Your best defense against a shocking phone bill starts before you even pack your bags. Taking just a few minutes to dive into your phone's settings is the single most important thing you can do to avoid accidental roaming charges. It’s a simple, proactive step that stops your phone from connecting to foreign networks and racking up fees behind your back.
A lot of travelers assume flipping one switch is enough, but modern smartphones are sneaky. They have all sorts of background features designed to keep you connected, and those can silently chew through data when you least expect it. Getting these settings right is fundamental to learning how to avoid roaming charges for good.
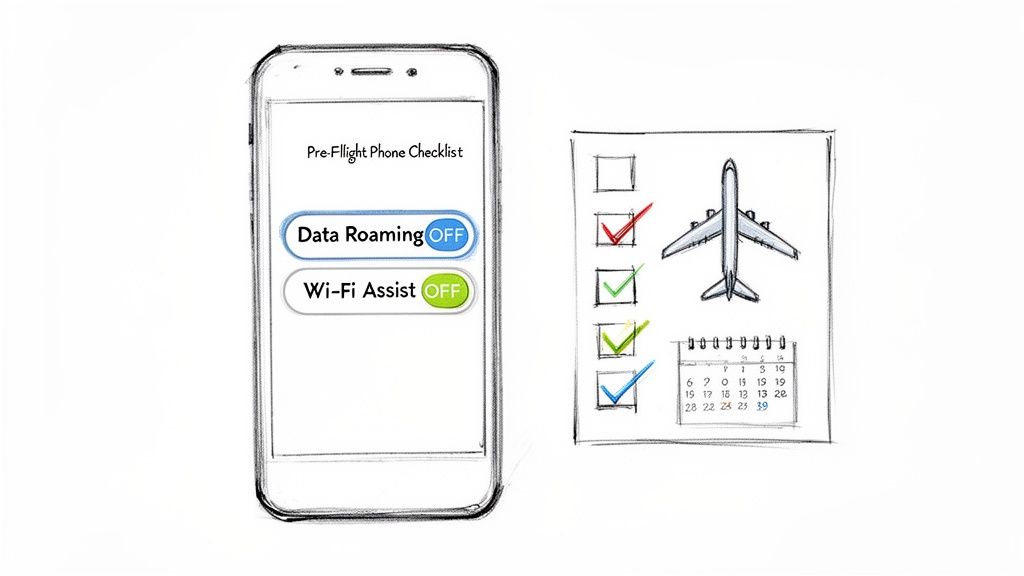
The Most Important Setting: Data Roaming
First things first: find and disable data roaming. This is the master switch that tells your phone not to use another carrier’s network for data when you’re outside your home turf. Leaving this on is like handing a foreign carrier a blank check.
Make sure this toggle is switched to the "off" position before you even think about leaving for the airport. It's your primary line of defense, but believe me, it’s not the only one you need to worry about.
Digging Deeper Into Your Settings
Beyond that main roaming switch, a few other settings can trip you up. These features are great for convenience at home but can quickly become expensive liabilities abroad.
For Both iOS and Android Users
- Turn Off Automatic App Updates: Head into your phone’s app store settings and set updates to happen only over Wi-Fi. A single large app update on a roaming network could easily cost you more than a nice dinner.
- Disable Background App Refresh: Apps love to refresh their content in the background, even when you're not using them. Turn this feature off completely, or at least for data-hungry apps like Instagram, Facebook, and news aggregators.
- Pre-Download Everything: Before you leave, download your maps, music playlists, podcasts, and shows. Every megabyte you don't have to stream is money back in your pocket.
Device-Specific Settings to Check
- iOS (iPhone): Disable Wi-Fi Assist. This sneaky feature automatically switches to cellular data when your Wi-Fi signal gets weak. It's a classic culprit for accidental roaming charges in airports or cafes with spotty connections.
- Android: Set a Data Usage Warning and Limit. Most Android phones let you set a monthly data cap. Before you travel, you can set this limit to something tiny (like 1MB) to get an immediate alert—and an automatic data shutoff—if anything slips through.
By taking control of these background processes, you're not just turning off roaming; you're creating a data-proof seal around your device, ensuring no accidental usage slips through the cracks.
Of course, managing your cellular settings is only half the battle. When you start relying on public networks to save data, security becomes the new priority. It's vital to protect your connection, and you can learn more from these Public Wi-Fi Security Tips to keep your information safe.
Ultimately, these pre-flight checks give you the confidence to use your phone without fear. Once you land, you can connect to the airport Wi-Fi knowing your device won’t betray you with hidden data use. This peace of mind is priceless, and it sets you up for smarter connectivity choices on the road, like using an eSIM. If you're wondering whether your phone is ready for that, you can check out our detailed guide on which phones support eSIM capabilities.
eSIM vs. Physical SIM: Picking Your Weapon Against Roaming Fees
Once your phone’s settings are locked down, it’s time to decide how you’ll actually connect abroad without getting ripped off. Your two main contenders are the modern eSIM and the trusty old physical SIM card. Both get you affordable, local data, but they’re built for different kinds of trips and travelers.
Think of it this way: an eSIM (or embedded SIM) is a digital chip already inside your phone. You just download a data plan to it, often in minutes. A physical SIM is that little plastic chip you have to buy at a kiosk and manually swap out.
This choice really defines your first few moments in a new country. Let's dig into which one makes sense for you.
The Rise of the eSIM: Instant Data When You Land
For most travelers today, the eSIM is a game-changer. Its biggest selling point is pure convenience. You can research, buy, and install a travel data plan from your couch a week before your trip or even while you’re waiting at the gate. No more hunting for a SIM card shop in a foreign airport or fumbling with that tiny pin tool in a cramped airplane seat.
This instant connectivity is huge. Imagine landing in Tokyo after a 12-hour flight, where your home carrier might charge a mind-boggling $7.80 per megabyte for roaming. A single photo upload could start a financial disaster. With a pre-installed eSIM, you just turn it on when you land and you’re online. You can find deals like 3GB of data in Japan for just $10—a cost that’s literally thousands of times cheaper. If you want to see just how wild these price gaps can get, check out the analysis over at TheBitjoy.com.
Here’s why travelers are flocking to eSIMs:
- Instant Activation: Buy a plan online, scan a QR code, and it’s ready to go. You activate it the second you land.
- Keep Your Home Number: Your physical SIM slot stays free, so your primary number remains active for calls and texts. Just make sure data roaming is toggled off for that line.
- Multi-Country Plans: Heading to a few places in Europe or Southeast Asia? Many eSIM providers offer regional plans that cover you everywhere without needing to swap SIMs at every border.
- No Physical Hassle: It's digital, so you can't lose it, break it, or have it stolen.
An eSIM’s real magic is eliminating that "connectivity gap"—that awkward, stressful time between landing and finding Wi-Fi. You’re online ordering a ride-share before your luggage even hits the carousel.
This digital-first approach is perfect for tech-savvy travelers, business folks who need to be online immediately, and anyone hopping between multiple countries.
The Old-School Reliability of Physical SIMs
While eSIMs get all the hype, don't count out the traditional physical SIM card. In certain situations, it’s still the undisputed champ, especially on price. In many parts of Southeast Asia, Africa, and South America, you can walk up to a street vendor or airport kiosk and grab a SIM with a massive data package for just a few bucks.
The process, of course, is much more hands-on. You have to find a reputable seller, maybe show your passport for registration (which is common), and then physically swap out your home SIM. The biggest downside? Your regular phone number goes completely offline. If you’re expecting important calls or need to receive two-factor authentication texts, that can be a major problem.
A smart workaround for this involves using one of the many dual SIM phones on the market. These let you use a cheap local physical SIM for data while keeping your home number active via eSIM for calls and texts, giving you the best of both worlds.
Making the Right Choice for Your Trip
So, eSIM or physical SIM? The right call comes down to balancing convenience, cost, and what your trip actually looks like.
| Feature | eSIM (Embedded SIM) | Physical SIM (Local Card) |
|---|---|---|
| Setup Process | Instant digital download via QR code | In-person purchase and manual swap |
| Convenience | High—buy anytime, anywhere | Low—requires finding a store upon arrival |
| Home Number | Remains active for calls/texts | Becomes inactive while swapped out |
| Cost | Very competitive, especially for regions | Can be extremely cheap for single countries |
| Best For | Multi-country trips, short stays, convenience | Long stays in one country, budget travel |
For most people on a typical vacation, the sheer ease of an eSIM makes it the clear winner for dodging roaming charges. Planning ahead and landing with a working data plan is a massive stress reliever. But if you’re a long-term backpacker or a digital nomad setting up shop in one country for a month or more, the rock-bottom prices of a local SIM might be worth the initial hassle.
Finding and Installing Your Perfect Travel ESIM
Alright, you're sold on the benefits of an eSIM. Let's get down to the practical side of things. This isn't some complex technical hurdle—it's a simple process you can knock out in a few minutes, giving you complete control over your data costs so you know exactly how to avoid roaming charges before your bags are even packed.
Think about it like booking a flight. You wouldn't just buy a ticket from the first airline you see, right? You'd use a comparison tool to find the best value. The same logic applies here, and it’s the secret to saving a ton of cash.
First, Make Sure Your Device Is Ready
Before you even start shopping for plans, the very first thing to do is a quick compatibility check. The good news is that most smartphones released since 2018—like the iPhone XS, Google Pixel 3, Samsung Galaxy S20, and anything newer—are already eSIM-ready.
You can usually confirm this in seconds right from your phone's settings:
- On iPhone: Head to
Settings>Cellular(orMobile Data). If you see an option to "Add eSIM" or "Add Cellular Plan," you're good to go. - On Android: Navigate to
Settings>Network & Internet>SIMs. An option to add a SIM with a "+" icon or a clear "Add eSIM" button means your phone is compatible.
Once you’ve confirmed your device is ready, you can get to the fun part: finding the perfect data plan for your trip.
How to Find the Best ESIM Plan
This is where you can be smart and save some serious money. Instead of going directly to a single provider, using a comparison platform like eSimGuide.com is a game-changer. These sites pull in offers from dozens of providers, letting you filter and sort plans based on what actually matters for your trip.
Here’s a real-world example of what you might see when searching for a plan for a trip to the USA.
This single view instantly lays out multiple providers, showing you the critical details—data amount, validity period, and price—all side-by-side. It makes spotting the best deal incredibly easy.
When you're comparing your options, focus on these key things to find the true value:
- Price Per Gigabyte (GB): Don't get fooled by the total price tag. A $20 plan that gives you 10GB of data ($2/GB) is a way better deal than a $15 plan that only offers 3GB ($5/GB). This is the single most important number for comparing value.
- Plan Duration (Validity): Make sure the plan's validity covers your entire trip. A cheap 7-day plan is totally useless if you’re traveling for two weeks. Look for plans that match or slightly exceed your travel dates.
- Network Coverage: Take a peek at which local networks the eSIM provider partners with. In a huge country like the USA, a provider that uses both AT&T and T-Mobile is going to give you far more reliable service than one that relies on a single, smaller network.
Pro Tip: I always recommend buying a little more data than you think you'll need. Running out of data mid-trip and having to scramble to top up is almost always more expensive and stressful than just getting a slightly bigger plan from the get-go.
Installing and Activating Your ESIM
Once you've bought your plan, the installation is shockingly simple and almost always follows the same three steps.
- Get Your QR Code: After you pay, the provider will email you a QR code. This little square contains all the information your phone needs to set up the eSIM profile. Do not delete this email!
- Scan the Code: Go back into your phone’s cellular settings where you first checked for compatibility ("Add eSIM"). Your phone's camera will open, ready for you to scan the QR code from that email. I find it’s easiest to open the email on a laptop or tablet and scan it with my phone.
- Label and Configure: Your phone will walk you through the last few clicks. You'll be asked to give your new eSIM a label (e.g., "Europe Trip" or "Japan Data"). This is super helpful for staying organized. Just make sure you set your new travel eSIM for cellular data and keep your home SIM for calls and texts.
And that's it. The eSIM is now installed on your phone, just waiting patiently. The last step is activation, but you should only do this when you land at your destination. Simply dive back into your cellular settings, tap on your travel eSIM, and toggle "Turn On This Line" to on. Within moments, your phone will connect to the local network, giving you affordable data from the second you step off the plane.
For a deeper dive into the mechanics of this, check out our complete guide on how travel eSIMs work.
Carrier International Plans vs. eSIMs: A Cost Comparison
Your carrier’s international plan looks tempting, doesn't it? That simple $10-a-day pass feels like the easiest option. It's familiar, promises to "just work," and removes one thing from your pre-trip to-do list.
But once you peek behind the curtain, you see the hidden costs and annoying limitations. For most trips, it's a surprisingly bad deal. This is where truly understanding how to avoid roaming charges comes down to a simple cost comparison. Let’s pit a standard carrier plan against a modern travel eSIM to see who really comes out on top.
The Problem with Daily Carrier Passes
That $10 daily pass seems straightforward, but the devil is always in the details.
Most of these plans give you a tiny sliver of high-speed data—we're talking just 500MB or 1GB a day. After you blow through that (which happens fast when you're using maps and uploading photos), your speed gets throttled down to a crawl. Good luck loading Google Maps or calling an Uber on a connection that slow.
A carrier’s daily pass is built for convenience, not value. You're paying a premium for a small amount of fast data, and that cost multiplies every single day of your trip, quickly blowing past the price of a much more generous eSIM plan.
For a one-week trip, that’s $70 gone from your travel budget. Planning a two-week vacation? You're now looking at $140 for what often becomes a frustratingly slow and limited data experience.
eSIMs: A Smarter Financial Choice
eSIMs flip the entire model on its head. Instead of paying daily, you buy a block of data for a set period, like 10GB that’s good for 30 days. This approach delivers huge savings, especially for any trip longer than a couple of days.
Take Europe, for example. While the "Roam like at Home" rule is great for EU residents, travelers from outside the bloc still face those high daily fees. A tourist from the US landing in Paris could easily pay $10/day to their carrier. Meanwhile, an eSIM provider might offer 10GB of data valid across Europe for 30 days for just $15 total.
Getting an eSIM set up is also way simpler than people think. It's really just a three-step dance.
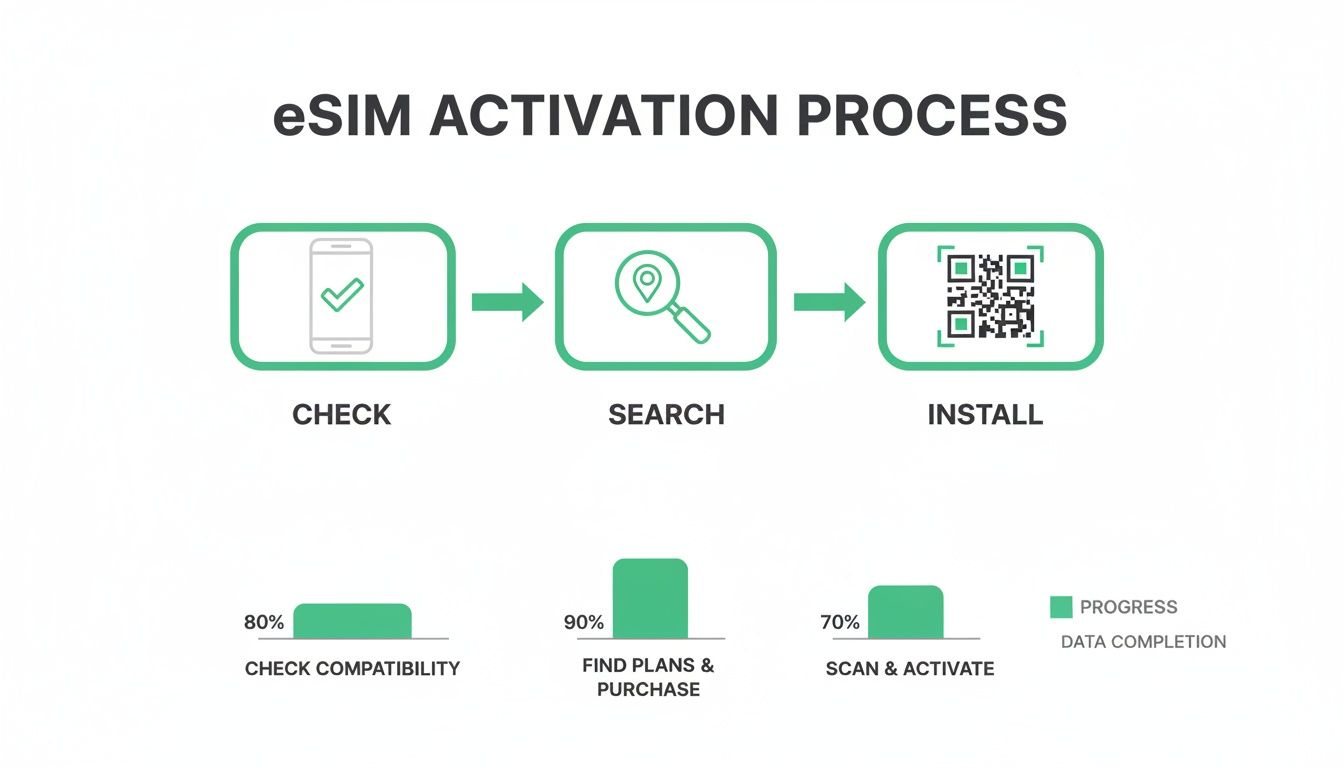
As you can see, it's just a matter of checking your phone's compatibility, finding the right plan for your trip, and tapping to install it. No tiny plastic cards, no fuss.
A Real-World Cost Breakdown
Let’s make this concrete with a real-world scenario: a 14-day family trip to Italy. Here’s a quick look at how the costs compare.
Cost Breakdown 14-Day Trip to Italy
| Option | Daily Cost | Total Data | Total 14-Day Cost | Notes |
|---|---|---|---|---|
| Carrier Day Pass | $10 | 1GB/day (then slow) | $140 | Data is limited daily, potential for slow speeds. |
| Travel eSIM | ~$1.21 (avg) | 20GB for 30 days | $17 | Abundant data for the whole trip, no daily caps. |
The difference is just staggering. For less than the cost of two days on a carrier pass, an eSIM gives you more than enough high-speed data for your entire two-week vacation. You can stream, navigate for hours, and upload all your photos without once worrying about hitting a daily cap or getting throttled.
For travelers visiting multiple countries, the savings become even more obvious. If you're planning that kind of adventure, check out our guide on the best global data plans.
So, what's the bottom line? If you're on a one-day business trip and your company is footing the bill, the carrier pass is undeniably simple. But for just about every other traveler—from backpackers on a budget to families on their dream vacation—the financial upside of an eSIM is too big to ignore.
Your Pre-Flight Checklist: Last-Minute eSIM Questions Answered
So, you've picked out the perfect eSIM for your trip. Awesome. But I've found that even with the best plan in hand, a few practical questions always seem to pop up right before takeoff.
Let's run through the most common ones I hear. Getting these sorted is the final step to traveling without worrying about that dreaded roaming bill.
Can I Still Get Calls and Texts on My Regular Number?
Yes, you absolutely can, and this is one of the best parts about using an eSIM for data. Your original, physical SIM card stays in your phone, which means your normal phone number remains active for incoming calls and texts. This is a lifesaver for things like two-factor authentication codes from your bank or important calls from back home.
But you have to set it up correctly to avoid any surprise charges. Here’s how:
- Make your eSIM the data champ: Go into your phone’s cellular settings and assign your new travel eSIM as the primary source for all mobile data.
- Keep your home SIM for calls/texts only: Leave your primary line active, but make sure you toggle Data Roaming OFF for that specific line. This is the crucial step that prevents it from racking up costs.
- Turn on Wi-Fi Calling: If your carrier back home supports it, enable Wi-Fi Calling before you leave. This lets you make and receive calls over any Wi-Fi network as if you were at home—often for free.
This dual-SIM setup gives you the best of both worlds: cheap, fast local data from the eSIM while staying connected to your essential home number.
What Happens If My eSIM Won't Connect When I Land?
It's a frustrating moment: you land, switch on your eSIM, and… nothing. Don’t panic. This is almost always a simple settings issue, not a faulty eSIM.
Before you even think about contacting customer support, run through this quick troubleshooting list. It works nine times out of ten.
- Check Roaming (for the eSIM): This sounds backward, but it's the most common fix. Go to your cellular settings, tap on your travel eSIM, and make sure the "Data Roaming" toggle is turned ON for that specific line. Your travel eSIM needs to "roam" on local partner networks to work.
- Verify the APN Settings: Sometimes a phone doesn't automatically pull the right Access Point Name (APN). Your eSIM provider will have included the correct APN details in the setup email. It usually takes less than a minute to type them in manually.
- Do a Full Restart: The classic "turn it off and on again" is your best friend here. A complete reboot forces your phone to establish a fresh connection with the local network.
Landing in a new country without data is stressful. But running through these three simple steps—checking eSIM roaming, verifying the APN, and restarting your phone—solves the problem 95% of the time without ever needing to contact support.
Can I Add More Data If I Run Out?
Yes, and most providers make this incredibly easy. You almost never have to buy and install a whole new eSIM. Instead, you just top up your existing plan.
The process is usually handled right inside the provider’s app or on their website. You just log in, find your active eSIM, and pick from a list of top-up packages. The extra data typically appears within minutes, getting you back online without skipping a beat. It’s another reason why managing your data abroad has become so much simpler.
Ready to find the perfect, affordable data plan for your next adventure? At eSimGuide.com, we compare plans from over 22 providers across 233 destinations, so you can land connected and avoid roaming charges for good. Find your next eSIM at https://esimguide.com.


