How Do eSIMs Work for Travel A Guide to Staying Connected
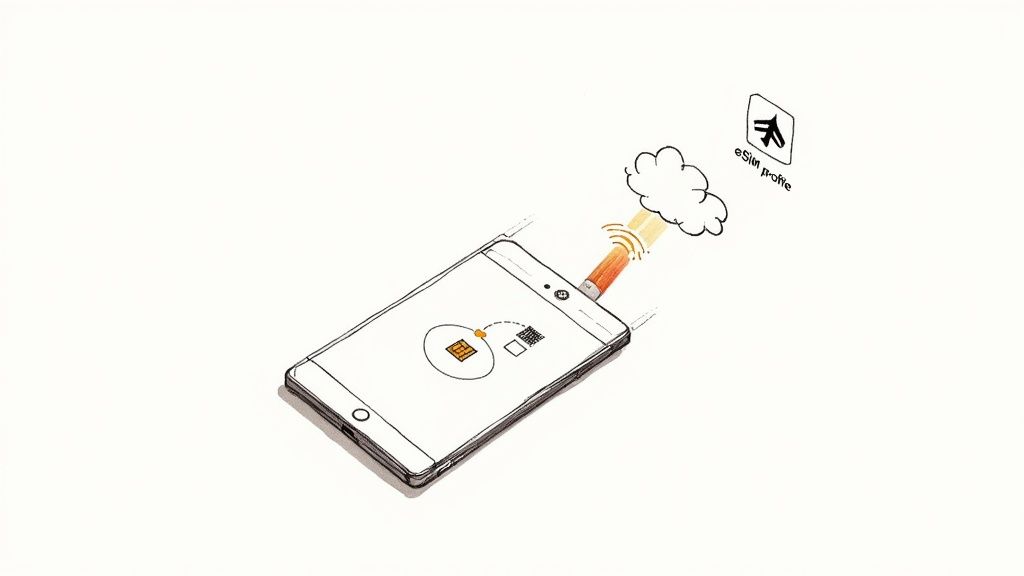
Think of an eSIM as a digital SIM card that's already built right into your phone's hardware. For travelers, this is a game-changer. It lets you download a local data plan from the comfort of your couch before you even start packing. Instead of fiddling with tiny plastic cards, you just install a digital "profile" over Wi-Fi, which connects your phone to a local network the moment you touch down.
Your Quick Guide to How Travel eSIMs Work
Here’s a simple analogy: imagine your phone has a blank, rewritable key built inside it. When you buy a travel eSIM, you’re basically purchasing a digital copy of a key that unlocks a specific mobile network in your destination. This "key" is a tiny data file called an eSIM profile.
You'll usually get this profile as a QR code sent to your email. Just scan it with your phone's camera, and that simple action installs the plan onto your device, getting it ready for your trip. It's a lot like pre-loading a transit pass onto your phone before you even get to the subway station.
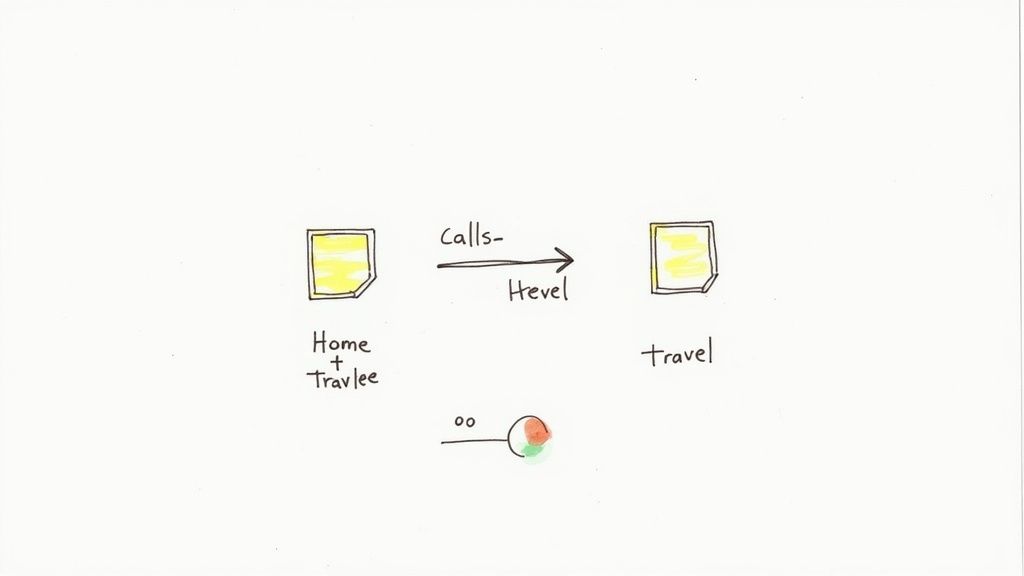
The Connection Process Simplified
Once you land and switch off airplane mode, your phone automatically senses its new location. It then activates the travel eSIM profile you installed, which tells it exactly how to connect to the local partner network. Your phone is essentially showing its pre-approved credentials to the local cell towers, giving you immediate internet access.
This seamless digital handover is the secret sauce behind how eSIMs work for travel, and it comes with some serious perks:
- Instant Connectivity: You’re online the second you land. No more hunting for a local SIM store or desperately searching for a free Wi-Fi hotspot.
- No Physical Hassle: Say goodbye to fumbling with tiny plastic cards and the constant worry of losing your primary SIM from back home.
- Big Cost Savings: eSIM plans are almost always cheaper than paying the steep daily rates for your home carrier's international roaming passes.
- Total Flexibility: You can buy and install plans for different countries from anywhere you have an internet connection. It's easy to compare eSIMs by country and pick the perfect plan for your specific itinerary.
The real magic of an eSIM is its sheer convenience. It turns a frustrating travel chore—finding and setting up a local SIM—into a simple, two-minute task you can finish before you even leave home. This small shift makes the first few moments of your trip so much smoother and more enjoyable.
To really see the difference, it helps to put the two options side-by-side. For years, the physical SIM card was the only game in town, but eSIMs have changed the rules completely.
eSIM vs Physical SIM at a Glance for Travelers
Here’s a quick comparison of how a modern eSIM stacks up against the traditional physical SIM card when you're on the road.
| Feature | eSIM (Digital SIM) | Physical SIM Card |
|---|---|---|
| Activation | Instant; scan a QR code or use an app. | Requires finding a store and swapping the physical card. |
| Delivery | Immediate, via email or app. | Must be purchased in person or shipped ahead of time. |
| Flexibility | Store multiple plans and switch between them easily. | Only one plan can be active at a time per SIM slot. |
| Convenience | No need to open your phone's SIM tray. | Risk of losing or damaging your home SIM card. |
| Best For | Multi-country trips, short stays, instant connection. | Long-term stays in a single country, older devices. |
While physical SIM cards still have their place, especially for travelers with older phones, the benefits of eSIMs are undeniable. The ability to get connected instantly, manage multiple plans digitally, and avoid the physical hassle makes them a superior choice for most modern travelers.
The Technology That Makes eSIMs Possible
So, how does this digital magic actually work? The 'e' in eSIM stands for embedded. Unlike the little plastic SIM cards we've been popping in and out of our phones for decades, an eSIM is a tiny, programmable chip soldered directly onto your device's motherboard when it's made.
Think of it like a blank, rewritable key that's already built into your phone. On its own, it doesn't do much—it’s just waiting for instructions. When you buy a travel eSIM plan online, you're essentially buying a unique digital file that tells this blank key exactly what to do.
That file is called an eSIM profile. It’s packed with all the crucial info—like network credentials and access rules—that your phone needs to connect to a specific mobile carrier in another country. This is how your phone knows which local cell towers to talk to and how to identify itself on that network, all without a physical piece of plastic.
Securely Delivering Your Digital Key
When you scan that QR code from your confirmation email, you’re kicking off a secure request to a special server. This server, known in the industry as an SM-DP+ (Subscription Manager - Data Preparation), is like a high-security digital vault. Its job is to generate your unique eSIM profile and send it securely over the internet straight to your device.
This whole process is built for security and simplicity. Your phone receives a digitally signed profile, which guarantees it’s authentic and hasn't been messed with. It’s like getting a sealed, official letter with instructions instead of some random note.
This technology allows your device to hold multiple eSIM profiles at once. You could have your home plan from Verizon or T-Mobile sitting right alongside a data-only plan for Japan and another for a quick weekend trip to Mexico. You just toggle between them in your phone’s settings, picking whichever one you need at that moment. Before diving in, it's always a good idea to check our comprehensive guide on which phones support eSIM technology to make sure your device is ready.
The shift to this technology shows just how much has changed in how we stay connected abroad. As international travel roars back to life, people are hunting for smarter, cheaper alternatives to old-school mobile roaming. This trend is fueling explosive growth, with market revenue from travel eSIMs projected to leap from $989 million in 2024 to $1.8 billion by the end of 2025—an 85% jump in just one year. You can read more about this massive growth and what it means for travelers in this Juniper Research report.
Activating Your First Travel eSIM Step by Step
Alright, let's get you connected. Moving from the idea of an eSIM to actually using one on your trip is surprisingly simple. The whole process, from picking a plan to getting online overseas, can be done in just a few minutes—often before you’ve even packed your bags.
This whole thing really boils down to three simple stages: buy your plan, install the profile on your phone, and flip the switch when you land.
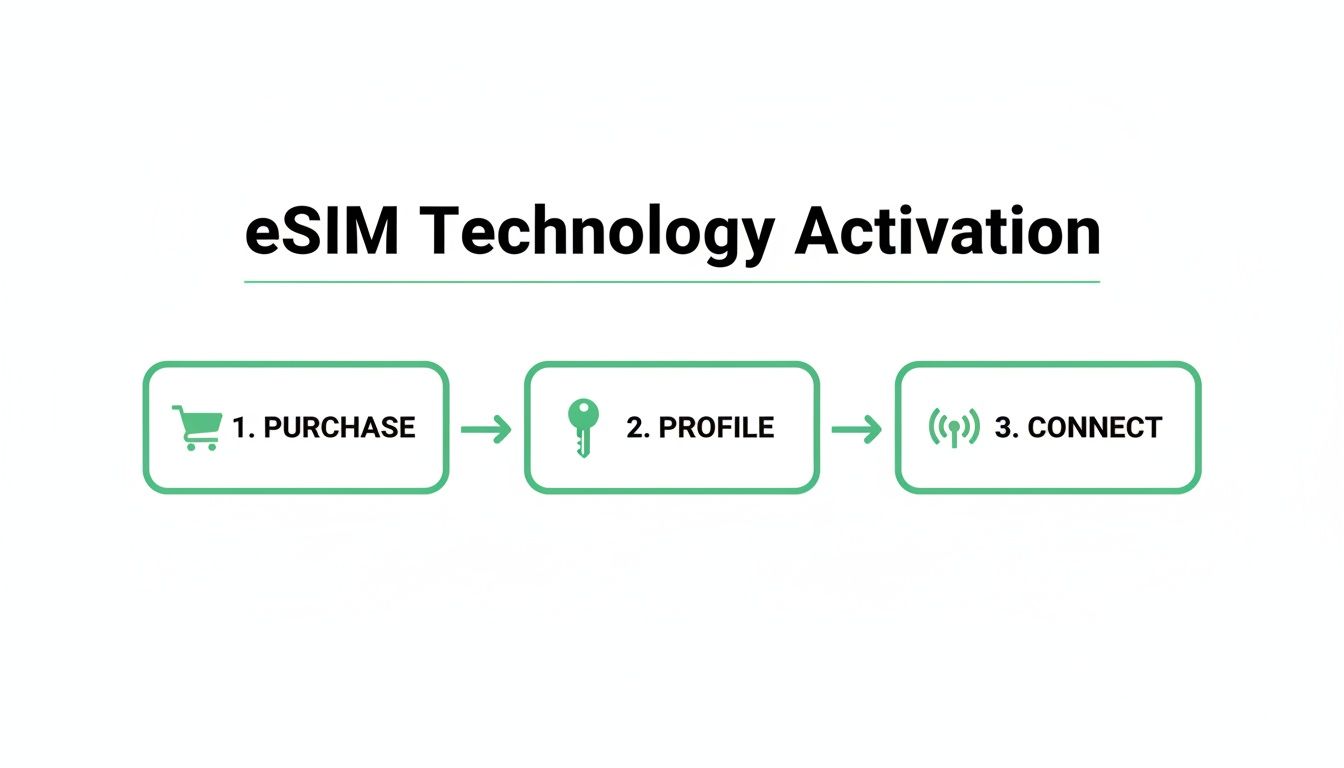
The beauty of it is that you handle all the setup from the comfort of your home. No more fumbling with tiny plastic SIM cards at a chaotic airport kiosk.
Finding and Purchasing Your Plan
First things first, you need a plan that makes sense for your trip. The easiest way to do this is with a comparison site where you can see all your options laid out clearly. You can filter by country or an entire region, compare how much data you get, and check prices from over 20 different providers to find the perfect fit.
The screenshot from eSimGuide.com shows exactly what I mean. You can instantly see multiple plans for a place like Japan and sort them by what matters most, like the price per gigabyte.
Once you pick a plan and pay for it, an email will land in your inbox almost immediately. This email is your golden ticket—it contains the activation details, usually in the form of a simple QR code.
Installing and Labeling Your eSIM
This is the part you absolutely want to do at home, while you still have a solid Wi-Fi connection. Trust me, don't wait until you're at the airport or, worse, after you've already landed.
- Find the "Add eSIM" Setting: On an iPhone, this is under
Settings > Cellular > Add eSIM. For Android users, it’s usually inSettings > Network & internet > SIMs, where you’ll tap the+icon to add a new one. - Scan Your QR Code: Your phone will ask how you want to add the plan. Choose the "Use QR Code" option and point your camera at the code from your confirmation email.
- Follow the On-Screen Prompts: Your phone will take it from here, walking you through the final few taps. This is when the eSIM profile actually downloads and saves itself to your device.
Pro Tip: As soon as it's installed, give your new eSIM a name. Labeling it something like "Italy Data" or "Europe Trip" makes it way easier to tell your SIMs apart, especially if you have a few on your phone. You can do this right in your phone’s cellular settings.
Activating Upon Arrival
Okay, this is the most critical piece of advice I can give you: install the eSIM at home, but wait to activate it until you arrive at your destination.
Why? An eSIM's validity period (like "7 days" or "30 days") almost always starts the second it connects to a network. If you activate it at home, you’re just burning through days of your plan before your trip even begins.
Once your flight has landed:
- Turn off airplane mode.
- Head back into your phone’s cellular settings.
- Find your travel eSIM and toggle it ON.
- Make sure Data Roaming is also turned ON for this specific eSIM.
- Finally—and this is key—set your travel eSIM as the primary line for Cellular Data.
Within a minute or two, your phone will find and connect to the local partner network. Just like that, you're online. Following these steps ensures you get a smooth connection the moment you need it and use every single day of the plan you paid for.
How to Choose the Right eSIM Plan for Your Trip
Picking the right eSIM isn't just about getting online—it's about matching the plan to your specific travel style. With a sea of options out there, understanding the core differences is key. Are you diving deep into one city, or are you bouncing between countries on a whirlwind tour? The answer will point you straight to the perfect plan.
Think of it like buying a transit pass in a new city. A single-day ticket is perfect for a quick layover, but a multi-zone monthly pass is the only thing that makes sense for a longer, more sprawling journey. eSIMs work the same way. You can get one that covers just one country, an entire region, or even the whole globe.
Single Country vs Regional Plans
For a trip laser-focused on one destination—say, a week in Japan or two weeks soaking up the Italian coast—a single-country plan is almost always your best bet. These plans are dialed in for that specific location, often giving you more data for your money because the provider has a direct deal with local networks. It's the most cost-effective way to go.
On the other hand, if your itinerary is a multi-stop adventure through France, Spain, and Germany, a regional eSIM is a lifesaver. It gives you seamless connectivity across multiple countries under a single plan, saving you the headache of finding and activating a new eSIM every time you cross a border. That convenience is priceless.
Key Factors to Consider
Beyond just where you're going, you need to weigh a few other critical factors. Getting this right is the difference between a smooth, connected trip and a frustrating one where you're constantly hunting for Wi-Fi.
- Data Amount: How much do you really need? If you’ll mostly be on hotel Wi-Fi and just need data for maps and messages, a small plan (1-3 GB) is probably enough. But if you’re a digital nomad streaming video calls or a heavy Instagram user, you'll want to aim much higher (10-20 GB or more).
- Plan Validity: Match the plan’s duration to your trip length. Buying a 30-day plan for a weekend getaway is just throwing money away. Likewise, a 7-day plan won't cut it for a two-week vacation, forcing you to top up mid-trip.
- Network Coverage: This is a big one. Before you buy, check which local carriers the eSIM provider partners with. This detail determines whether you get blazing-fast 5G or sluggish 3G. You can usually find this info on the plan details page. Our guide to the best eSIM providers breaks down these network partnerships to make it easier.
- Calls and Texts: Heads up: most travel eSIMs are data-only. If you absolutely need a local phone number for calls or texts, you’ll have to hunt for a specialized plan. They’re less common and usually cost more.
By carefully considering these four points—data, validity, coverage, and calling needs—you can confidently select an eSIM that perfectly aligns with your travel plans, ensuring you stay connected without overspending.
This careful selection process is becoming more important as the market explodes. Fueled by the massive rebound in tourism, the travel eSIM market hit a value of US$1.46 billion in 2024 and is projected to more than double to US$3.08 billion by 2032. This growth is sparking serious competition, with providers rolling out more flexible and affordable plans every year. You can dig into more insights about this expanding market and its key players.
Using Your eSIM and Home SIM Card Together
One of the slickest features of eSIM technology is the ability to run two mobile plans on your phone at the same time. This dual SIM capability gives you the best of both worlds: you get cheap, local data for your trip while keeping your home number active for important calls and texts.
Think of it like having two separate phone lines in a single device. Your physical SIM card stays connected to your home network, so you can still get crucial calls and texts—like those two-factor authentication (2FA) codes from your bank. At the same time, your travel eSIM does all the heavy lifting for mobile data, connecting you to a local network for things like maps, browsing, and messaging apps without the outrageous roaming charges.
This setup is the secret to dodging those eye-watering roaming bills from your carrier back home. You get fast, affordable local data through the eSIM, all while ensuring you never miss a critical message on your regular number.
Configuring Your Phone for Dual SIM Use
Getting this all working is surprisingly simple. Your phone’s settings give you full control, letting you assign specific jobs to each SIM so they work together seamlessly.
Here’s the typical way to assign roles to each line:
- Primary SIM (Your Home Number): Set this as your Default Voice Line. This makes sure any calls you make go out on your usual number and that you can still receive incoming calls.
- Travel eSIM (Your Data Plan): Designate this line for Cellular Data. This is the most important step—it tells your phone to use the cheap travel plan for absolutely everything internet-related.
By assigning these roles correctly, you create the perfect travel phone. Your device will intelligently use the eSIM for data-hungry apps like Google Maps and Instagram, while your home SIM sits quietly in the background, ready for essential voice calls and SMS.
This clever configuration is a huge reason why global eSIM use is exploding. By 2025, an estimated 19% of all international travelers—that's nearly one in five—will rely on eSIMs. It’s a clear sign that people are tired of expensive roaming and spotty public Wi-Fi. You can find more insights on this growing trend in travel tech.
Prerequisites for Dual SIM Success
Before you can take advantage of this setup, there are just two boxes to check. First, your smartphone must be eSIM-compatible. The good news is that most flagship phones from Apple, Google, and Samsung made in the last few years already have the technology built in.
Second, your phone needs to be carrier-unlocked. An unlocked phone isn't tied to a single carrier, giving you the freedom to install and use an eSIM from any provider you want, anywhere in the world. If you're not sure about your phone's status, it's best to contact your home carrier and ask them to confirm.
Troubleshooting Common eSIM Connection Problems
Even the best-laid travel plans can hit a snag, and technology is no exception. That sinking feeling when you land, switch off airplane mode, and see "No Service" is all too common, but don't panic. The fix is almost always simple.Most of the time, the problem isn't a faulty eSIM but a minor setting you overlooked in the rush to get going. Before you start digging through support forums, it helps to run through a quick mental checklist. Did you activate the eSIM after landing? Is your phone's software up to date? These little details often solve the problem in seconds.
Initial Troubleshooting Checklist
If you're not getting a connection, start with the absolute basics. These four checks resolve the vast majority of eSIM issues that travelers run into, from a dead signal to painfully slow data.
-
Verify Your eSIM Is Active: Go into your phone’s cellular settings (
Settings > Cellularon an iPhone orSettings > Network & internet > SIMson Android). You'll see your eSIM listed—make sure the toggle next to it is switched ON. It's surprisingly easy to forget this step after installation. -
Enable Data Roaming: This is the big one—the most common culprit by far. Your travel eSIM needs data roaming to be enabled so it can connect to local partner networks. Find the "Data Roaming" toggle for your travel eSIM and make sure it’s ON. Just be sure you’re not turning it on for your home SIM!
-
Check Your Cellular Data Line: Your phone needs to know which SIM to use for data. Dive back into your cellular settings and confirm your travel eSIM is selected as the primary line for "Cellular Data" or "Mobile Data."
Think of it like checking the simple stuff before calling a mechanic. Is the car turned on? Is it in the right gear? Getting these settings right is the foundation for getting your eSIM to work abroad.
Advanced Connection Fixes
So, you’ve gone through the initial checklist and you’re still offline. Don't worry. There are a couple more tricks that can nudge your phone into finding and locking onto the right local network.
Sometimes, a phone gets stubborn and won't automatically pick the best local carrier. You can give it a hand by selecting one manually. In your phone's cellular settings, find the "Network Selection" option for your eSIM and turn off "Automatic." Your phone will scan and show you a list of available networks. Just pick one that your eSIM provider supports (they usually list their partners on their website or in the app).
You should also check your APN (Access Point Name) settings. Most eSIMs configure this automatically, but every now and then, a manual entry is required. Your eSIM provider should have included the APN details in your confirmation email or setup guide. Head to your APN settings and enter them exactly as provided. This tells your device the precise path to access the data network.
Still Have Questions About Travel eSIMs?
Even after digging into the details, a few practical questions always pop up. Let's tackle some of the most common ones travelers run into.
Can I Reuse My Travel eSIM on Another Trip?
Usually, the answer is no. Most travel eSIMs are sold as single-use, data-only packages. Once your plan runs out of data or the validity period ends, the profile becomes inactive.
Think of it like a single-use train ticket—great for one journey, but you'll need a new one for the return trip. For your next adventure, you’ll just buy and install a new eSIM profile designed for that specific destination. That said, some providers are starting to offer top-up options, so it's always worth checking the fine print before you buy.
What Happens if I Delete My eSIM Profile by Accident?
Whatever you do, try not to do this! If you accidentally delete an active eSIM profile from your phone, you almost certainly can't reinstall it with the same QR code. That code is a one-time key for a single, secure installation.
If the worst happens, get in touch with your eSIM provider's customer support right away. They’re the only ones who can help. They might be able to issue a brand-new activation code to get you back online, but it’s not always guaranteed. Your best bet is to leave the profile on your phone until you're safely back home.
Does Using an eSIM for Data Drain My Battery Faster?
Nope, this is a common myth. Using an eSIM for data won't drain your phone's battery any faster than using a traditional plastic SIM card.
What actually drains your battery is your data usage—things like streaming video, navigating with GPS, and having apps running in the background. The strength of your network signal also plays a big role. The technology itself, whether it's an embedded chip or a physical one, has a tiny, almost unnoticeable impact on battery life. Your phone uses the same amount of power to connect to a network regardless of the SIM type.
Ready to find the perfect plan for your next adventure? At eSimGuide.com, we compare prices and features from over 20 top providers to help you get connected instantly, affordably, and without the hassle. Explore your options at https://esimguide.com.